
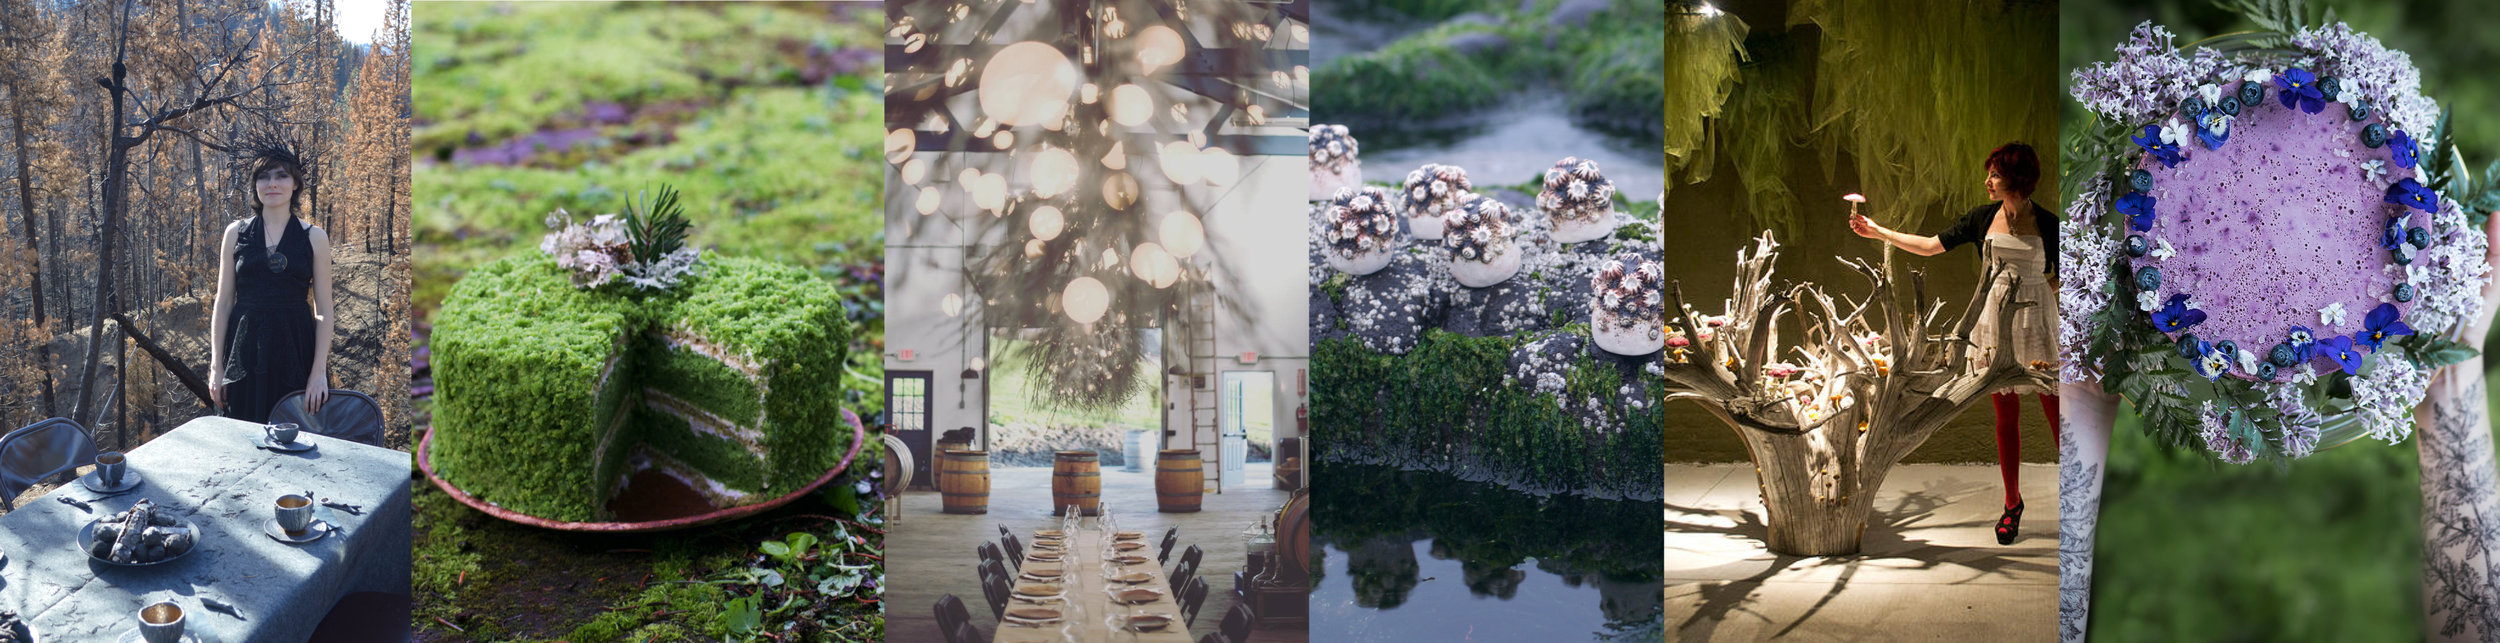


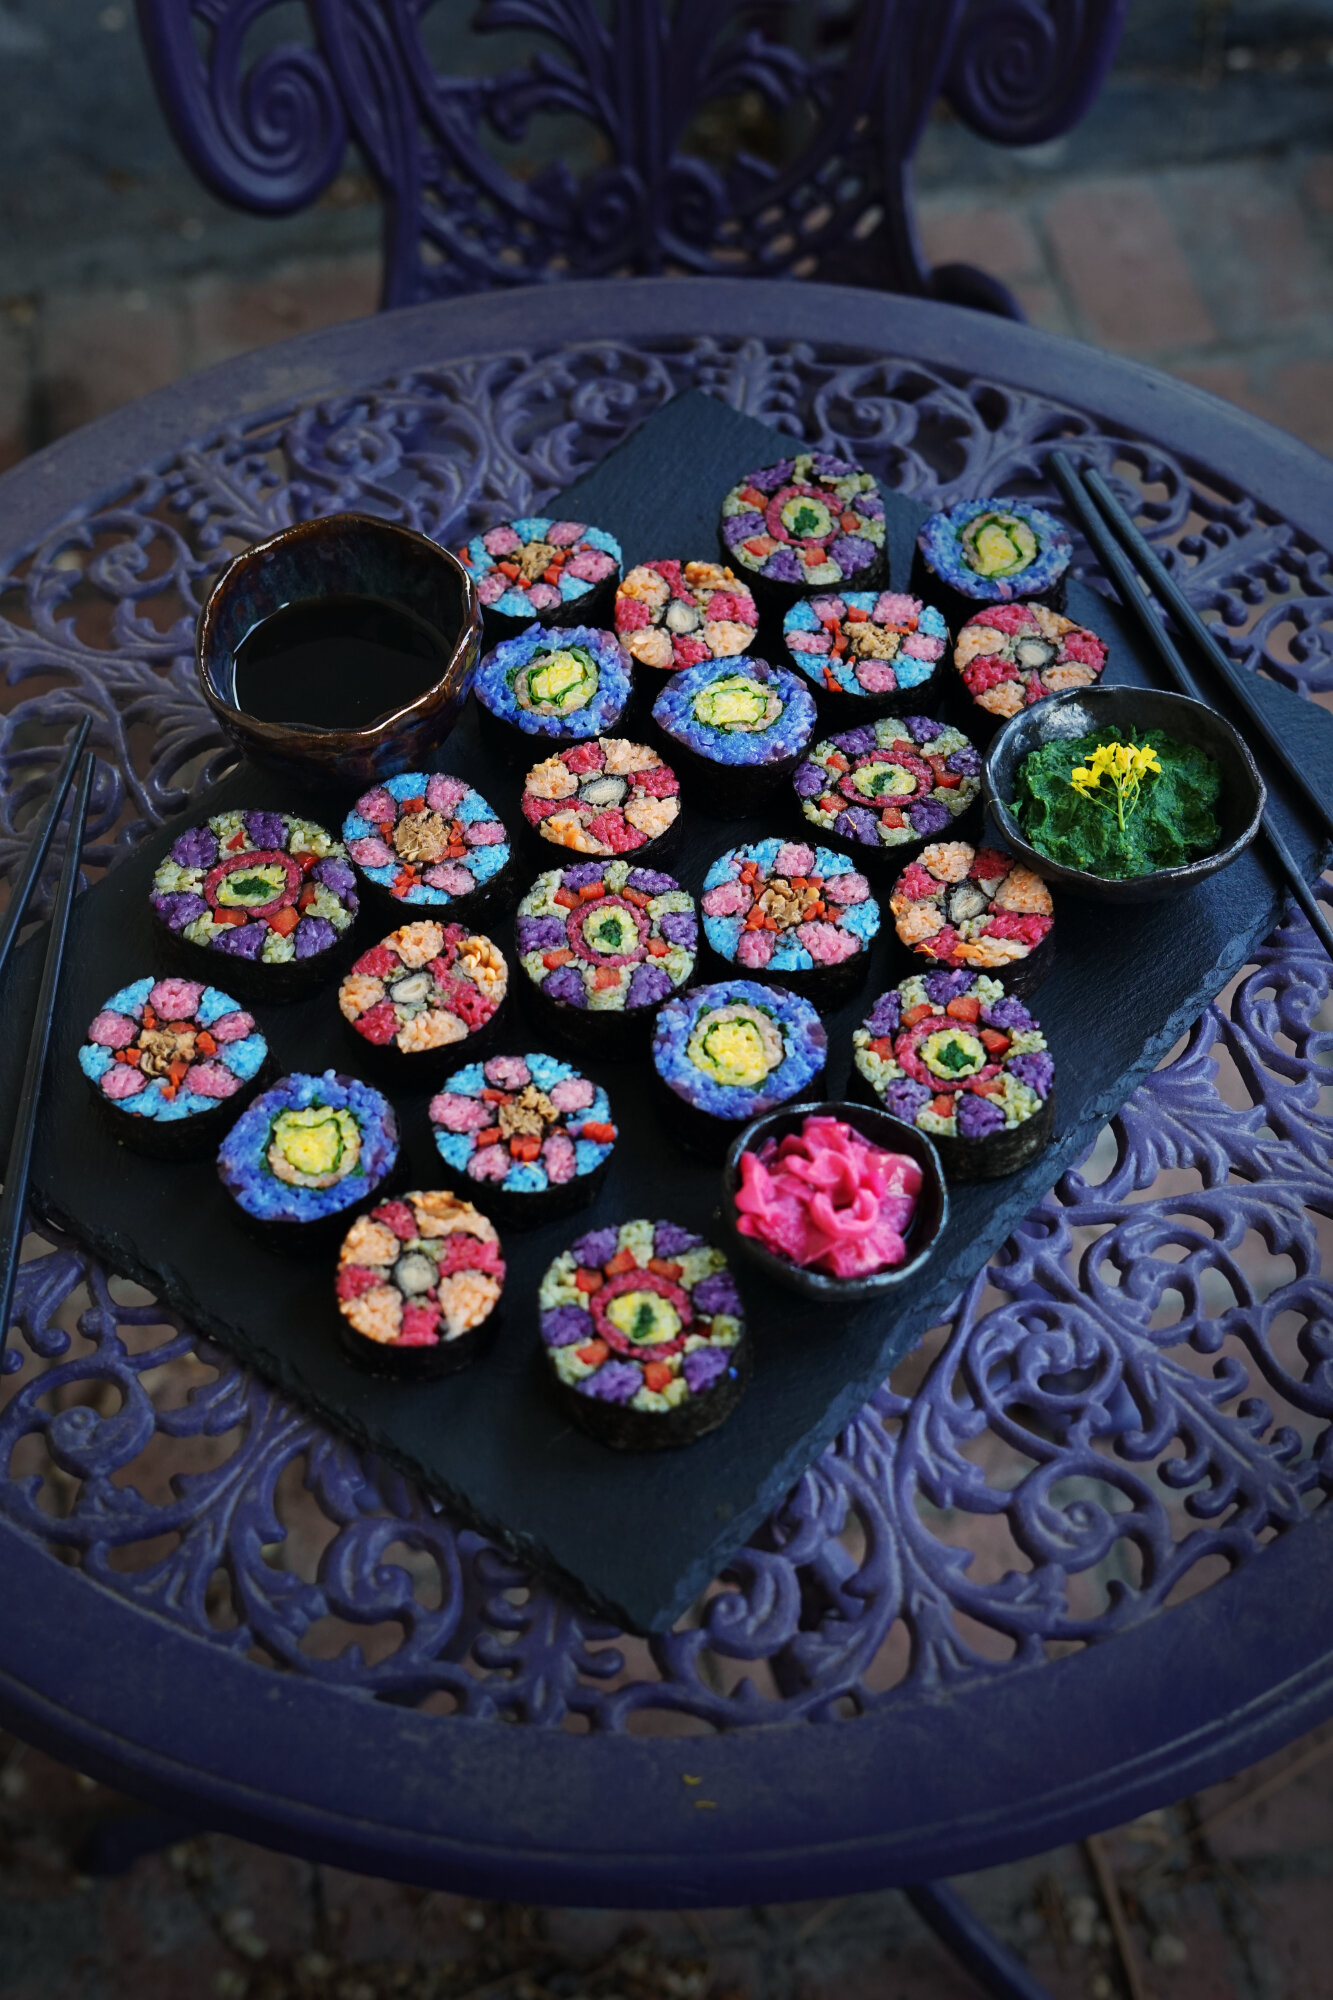
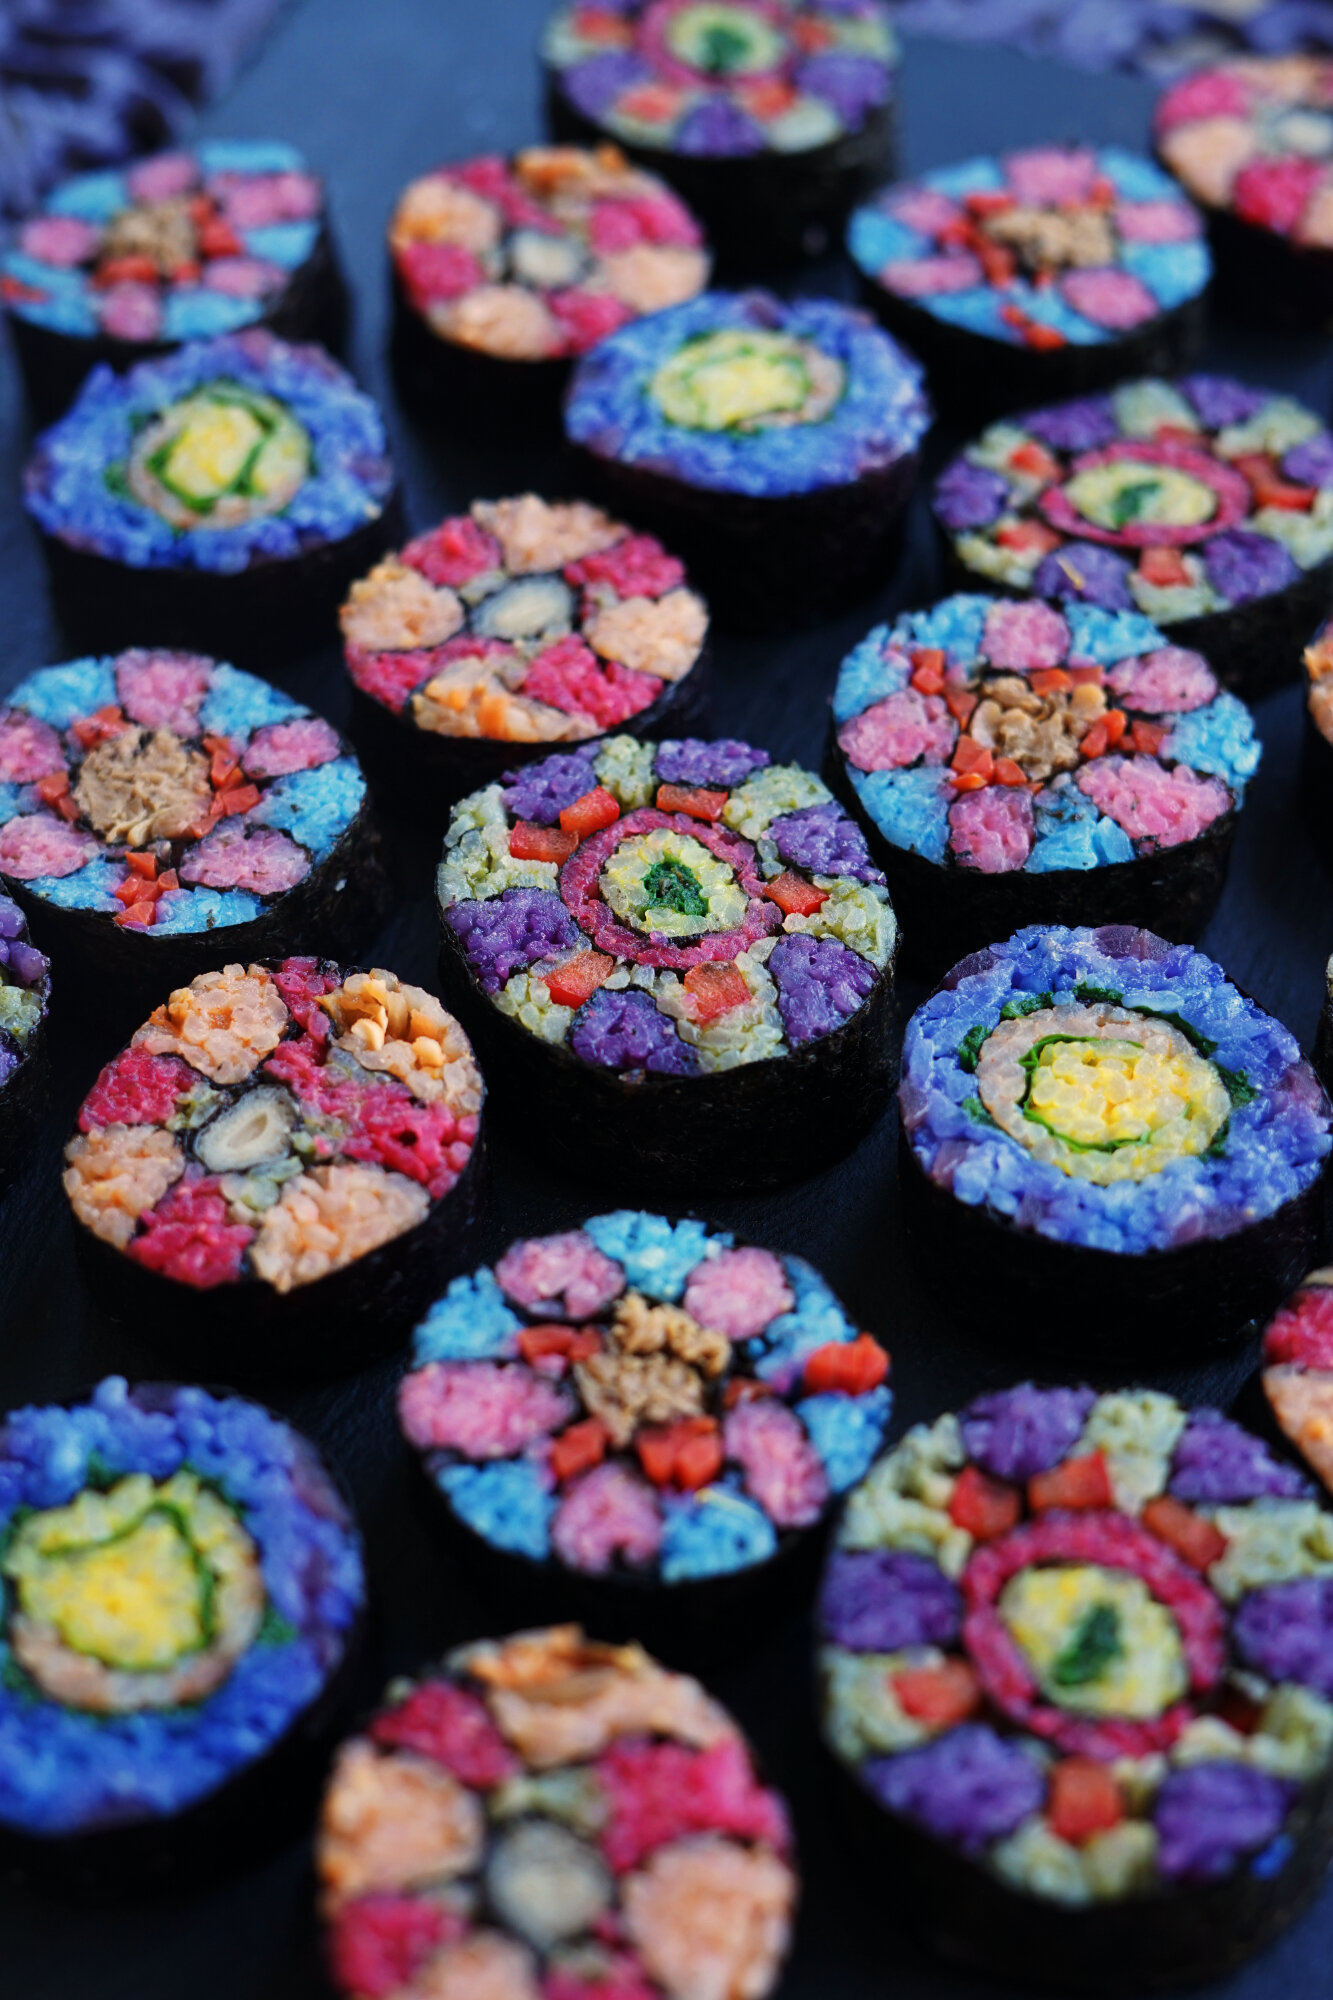
Flower Millefiori Sushi with Wildcrafted Delights
The story of this floral patterned sushi begins a long, long time ago on the island of Murano, Italy. (Or even further back to Ancient Egypt!) That might seem like an unlikely inspiration for a sushi recipe, but oh, how ideas can travel...
It all begins with glass, one of the big loves of my life. There is no mistaking it: hot glass is mesmerizing. Creating blown glass artwork is a carefully-choreographed dance of heat, tools, and white-hot glass that moves like golden honey. It is unlike anything I have ever worked with, and I easily sink into a focused “flow” state when I am working with hot glass, whether in a glassblowing studio or with a torch.
In my studies with glassblowing, one of my favorite challenges was creating millefiori. Italian for “thousand flowers,” this is a detailed process of creating floral designs in glass. An image is built up on the end of a sturdy punty (solid metal rod used in glassworking.) Layers of opaque or transparent color are heated and applied or shaped using large metal molds. The glass is carefully kept hot to avoid thermal shock and cracking through the entire process of creating a design. It’s a delicate, time-consuming technique, requiring a great level of skill and understanding of glass. (Not only does the glassblower need a good sense of color, pattern, and design, they also need to understand how each individual color of glass behaves and how to keep the heat just right.) When a design is finally completed, the whole thing is heated up until it is the perfect level of softness to pull. The glass is then stretched just like taffy! Once this long rod of glass cools completely, it can then be cut into thin segments, each with the cross-section of the original flower design. These can be re-applied to glass in a variety of ways. When mixed with other millefiori patterns, a blown glass bowl can look like a vibrant wildflower meadow! If you’ve never witnessed this process, this video is a soothing glimpse into the magic of molten glass.
Of course, the most wonderful thing about magic is how it spreads. The same technique of creating a pattern and slicing it can be seen in hard candies (where molten sugar is manipulated in a similar way as the glass), icebox cookies, and even in a much newer creative medium: polymer clay.
Sushi is a roll that is sliced to reveal the fillings, so it’s really not a huge leap to start seeing some millefiori inspiration there, too. While the technique of rolling sushi rolls is distinctly Japanese, it has spread throughout the United States and a sushi restaurant can be found in just about every mid-sized town or city I have ever been to, at least here in the Northwest. Sushi represents Japanese perfection with the perfect delicate balance of ingredients and light flavors, all steeped in centuries of tradition. American-ized sushi has allowed some adaptations, such as the inclusion of cream cheese or any number of new fillings or toppings. Since one of my biggest passions is exploring the flavor of my region, I decided to experiment a bit with foraged ingredients. Add some natural colorings and a mind full of millefiori flowers and you get a roll of sushi as delicious as it is beautiful.

I’ve designed my rolls to be plant-based, but you could certainly incorporate salmon or other fish that can be eaten raw. There is a lot of room for experimenting when it comes to flavors! I particularly love rolling up crunchy pickled vegetables and fresh spring greens. Even the accompaniments can be replaced by foraged flavors: pickled magnolia petals with their spicy ginger-like flavor and ground bittercress or wild mustard for the sharp bite of wasabi. This recipe is more a guide to create your own customized wildcrafted millefiori sushi than it is a specific recipe. I would encourage you to explore your own area for foraged ingredients and enjoy the process of designing your flowers as well!

The fillings I used for the sushi shown: fresh violet leaves, beet-pickled carrots, mushrooms cooked with a little bit of soy sauce, blanched wild onion leaves, red bell peppers, pickled red onions, kimchi, and pickled cattail shoots
Ingredients for 3 rolls:
1 ½ c. cooked sushi rice
6-9 sheets dried nori seaweed
Fillings or vegetables of choice
A bamboo mat
Directions:
Sketch the design you want on a piece of paper, to scale (so about 1.5” in diameter. This will help you determine how thick individual rolls of colored rice or fillings need to be to fit in the design.
Cook sushi rice according to the package directions. Plan to use about ⅓ c. uncooked rice per sushi roll.
Once the rice has cooked, use a wooden spoon to portion it out into individual bowls based on your design(s). Color each bowl by adding the ingredient recommended for that color and mixing gently with the wooden spoon. Let the rice cool to room temperature, then start rolling. Keep each bowl covered with a damp cloth to prevent it drying out before you use it.
It’s easier to start with two colors (plus a filling) in your design, which is why the color suggestions below are for approx. ¾ c. of rice, enough for one solid-color sushi roll. If you want to color more, adjust the recipes as needed. As you become more comfortable and skilled, you can experiment with more colors or more advanced shapes in each roll as well.
Cut one sheet of nori into six equal long rectangles. Doing one at a time, spread a little colored rice on top and roll in a tight cylinder. This will be the equivalent of one petal in your design, so make as many rolls as you want petals. Make sure the width of each roll is similar to the design you sketched, otherwise the size of your roll could end up much bigger or smaller than you intended. If you want a teardrop shape, gently and evenly press one side of the long roll down to make a point. You can do this on both sides to make an eye-shaped petal too.
Make another small roll containing your fillings of choice. It’s easier to get it really tight around smaller pieces, so chop any large fillings into smaller pieces and roll as tightly and evenly as possible. The exceptions are if you are using large, solid pieces such as salmon, avocado, or whole asparagus stalks.
Lay out another sheet of nori on the mat and place a little rice on it. As you roll up all the pieces of your flower design, you’ll want to add either rice or long strips of cut vegetables to support the shapes of the petals. Roll slowly and carefully, packing the rice into the design tightly. Roll excess nori up around the designed roll. Slice the roll to reveal your lovely design! Repeat this process to make more similar rolls, or try another design for each.

Coloring sushi rice:
I have found that the easiest way to color sushi rice is to mix powdered natural ingredients with the small amount of vinegar (or water, depending on the color) that is then added to give it a little flavor. You can also add purees made from fresh fruit or vegetables. I usually start with about one Tbs., then adjust it based on consistency, color, and flavor. Be careful not to introduce too much moisture to your rice so it stays sticky enough to roll neatly. Natural fruit and vegetable powders can be found in many grocery stores or specialty food shops. Keep in mind how the flavors of the colors will work with your fillings! My guidelines for a rainbow of colors are below, in amounts recommended for 3/4 cup of cooked sushi rice, which is about the right amount for half of one roll. Most rolls are made with 1 1/2c. Cooked sushi rice, so these are the perfect amounts if you are using two colors in your design. If you want to make four rolls and try out every color, you’ll need 6 cups of cooked sushi rice.
Pink: ¼ tsp. Beetroot powder mixed into ½ Tbs. rice wine vinegar, ½ tsp. sugar, and ¼ tsp. salt OR use violet-infused vinegar for a more subtle pink color OR mix in a little smooth beetroot puree
Red: 1 tsp. Beetroot powder mixed into ½ Tbs. rice wine vinegar, ½ tsp. sugar, and ¼ tsp. salt OR a little concentrated tomato paste
Orange: 1 tsp. Goji berry powder mixed into ½ Tbs. rice wine vinegar, ½ tsp. sugar, and ¼ tsp. salt OR stir in some spicy harissa paste OR carrot puree
Yellow: ¼ tsp. Ground turmeric mixed into ½ Tbs. rice wine vinegar, ½ tsp. sugar, and ¼ tsp. salt OR a pinch of saffron steeped in the vinegar for about 20 minutes for a more floral flavor
Green: 1 tsp. Matcha tea powder mixed into ½ Tbs. rice wine vinegar, ½ tsp. sugar, and ¼ tsp. salt OR stir in some finely-pureed spring greens
Blue: ½ tsp. Blue spirulina powder mixed into ½ Tbs. rice wine vinegar, ½ tsp. sugar, and ¼ tsp. salt
Indigo: 1 tsp. Butterfly pea powder mixed into ½ Tbs. water, ½ tsp. sugar, and ¼ tsp. salt
*note: if you add any acid to this mixture, it will turn purple or pink rather than blue
Violet: ½ tsp. Violet carrot powder and 1 pinch blue spirulina mixed into ½ tsp rice wine vinegar, ½ tsp. sugar, and ¼ tsp. salt OR 2 tsp. Purple yam powder OR some fresh blueberry puree

Foraged ingredients to use raw:
Wild onions or ramps
Bittercress
Sorrel
Miner’s lettuce
Nasturtiums
Violets
Edible seaweeds
Foraged ingredients that are great pickled:
Cattail shoots
Magnolia petals
Wild asparagus
Fiddlehead ferns
mushrooms
Foraged ingredients to cook:
Wild edible mushrooms
Stinging nettles

Spicy Greens:
This flavorful green paste is a great stand-in for Wasabi. It’s not quite as spicy, but it is full of flavor! You could also mix in some traditional wasabi powder to get a flavorful kick.
Ingredients:
5 whole ramps
½ c. wild mustard (leaves and blooms)
¼ tsp. Salt.
¼ tsp. Wild mustard seeds
Directions:
Blanch the ramps and wild mustard for 35 seconds in boiling salted water, then plunge into an ice bath and pat dry with a clean towel.
Add the blanched greens to a mortar and pestle along with the salt and mustard seeds and grind into a paste.

Pickled Magnolia Petals:
Magnolia petals have a delightful spicy-floral flavor, which makes them a perfect accompaniment to wildcrafted sushi! We love eating these on just about everything - salads, rice, even breakfast eggs!
Ingredients:
3 cups packed fresh magnolia petals
1 tsp salt
1 c. red wine vinegar
½ c. sugar
1 tsp. Salt
A couple of slices of fresh ginger root
Directions:
Add the first tsp. Of salt to a medium pot of water and bring to a boil. Blanch the magnolia petals for 30 seconds, then quickly drain and plunge into a cold water bath. Drain and pat dry, then pack the petals into a couple of sterilized glass jars.
Add the rest of the ingredients to a small saucepan and bring to a boil. Pour over the magnolia petals and seal the jars. Store in the fridge for up to two months. (You can also waterbath can these for longer preservation, but be warned that they will start to fade in color after a month or two.)

Brown Sauce:
I amped up the traditional soy sauce with the brine from my pickled green walnuts, which tastes surprisingly like worcestershire sauce. You could just use soy sauce, or try mixing it with some worcestershire sauce if you haven’t ever pickled green walnuts (but, come early summer, you should give that a try too!) My mixture was approx. 50/50% soy sauce and pickle brine. It had great depth of flavor and I liked the extra acidic bite.
Love what you’ve read here? Don’t forget to Subscribe to get frequent updates of new posts!
Huge thanks to my Patrons that make sharing all of these lovely posts with you possible (without all of the pop-ups and ads that make browsing other blogs so annoying). If you’re feeling generous, you too can support the wonder with a monthly contribution of your choice. Even $1 helps a lot! Your donation will help to fund this blog as well as my surprise free events and gifts for strangers. Learn more about this program at the link below:

New to foraging? Learn more about ethical and safe foraging (plus how to get started) here!
Note: As an Amazon Associate I earn from qualifying purchases on some linked items. All are items that I use myself and would recommend to others, and this service is provided at no extra cost to you! Read more about this program here.


Join me for a little winter night magic as we bake this cake full of rich seasonal flavors and black cocoa!